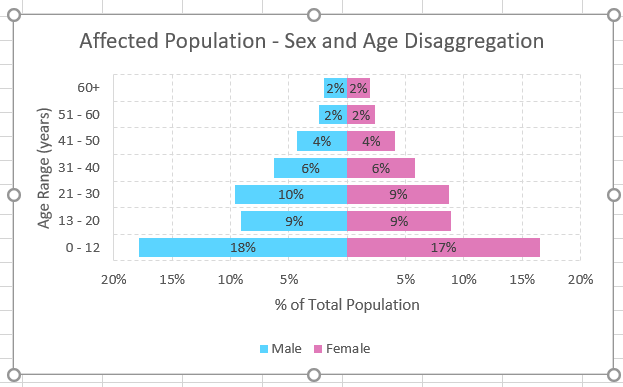
One of the best charts to make when you’re reviewing household survey results is the male/female demographics pyramid chart that looks like this:

Want to know EXACTLY how to use your data to make this type of pyramid chart? Read on…
First of all, you need to have data that’s disaggregated by sex and age. What does that mean? It means your data on your beneficiaries needs to include whether each person is male or female, and how old they are.
1. summarize your data into a sex-and-age-disaggregated summary table.
Your data should look something like this:

2. Change the “male” column of numbers into negative numbers.

Your data should now look something like this:

3. Change your absolute numbers of beneficiaries into percentages of the total population.

Your data will now look like this:

Once you have your data in this format, then you can proceed to turn that into a sex and age pyramid chart.
4. Create a horizontal stacked bar chart.

5. Add the population data to your chart.
First, go to “Select Data” by right-clicking on your chart.

Add your first series of data, by selecting the “Female Data”. Click on the “Add” button under Legend Entries (Series).

Then, for the “Series name”, select the cell with the word “Female” in it. And for the “Series values”, select the range of cells with the percentages of females per age category, as this picture shows:

Add a second series with the “Male” data.

Add the horizontal axis labels by clicking on “Edit”.

Select the Age Ranges you want as labels.

Select OK.

6. Add a chart title above the chart.

7. Add a legend at the bottom of the chart.

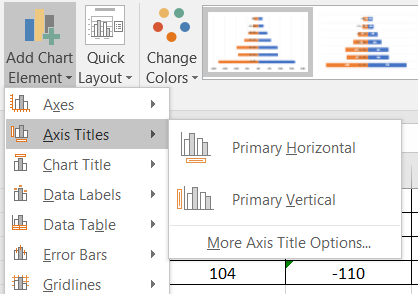
8. Add both horizontal and vertical axis labels.

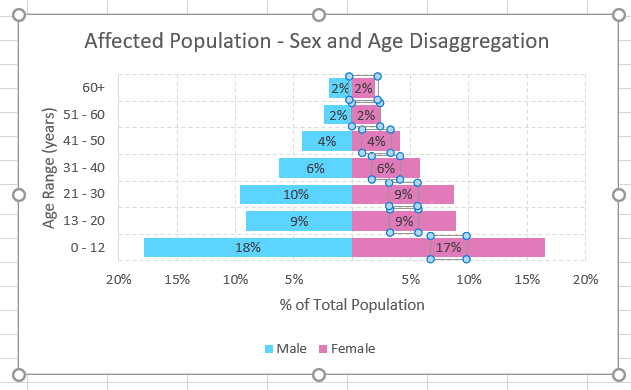
9. Add data labels, centred within each bar.

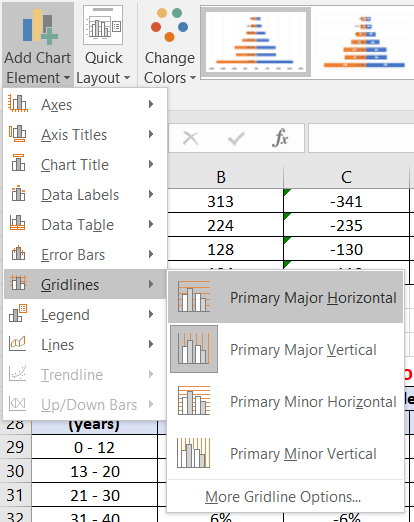
10. Add both Primary Major Horizontal and Primary Major Vertical Gridlines.

Once you’ve added all those chart elements, you’ll see the very rough beginnings of your pyramid chart:

11. Modify your chart and axis titles.
Change the title.

Change the vertical and horizontal axis labels.

12. Put the vertical axis values on the far left side of the chart.
Select and right click on the select the horizontal axis values, and choose “Format Axis…”.

Then, change where the vertical axis crosses from “Automatic” to “Axis value” = -0.2 (or whatever the lowest value on your horizontal axis is).

Your vertical axis on your table should now look like this:

13. Get rid of the “negative numbers” in your horizontal axis (male values).
Select your horizontal axis.

Format your axis “number” first by un-checking “Linked to source”.

Then type 0%;0%; into the Format Code box and click “Add”.

The horizontal axis on your pyramid chart will now look like this – no more negatives!

14. Change your vertical and horizontal gridlines to a dashed line.
Select the vertical gridlines.

Then format the gridlines to a dashed line type.

Select the horizontal gridlines.

Then format the gridlines to a dashed line type.

Now your pyramid chart looks like this.

15. Modify the colours of the bars and the gap between the bars.
Select the female bars by clicking on them.

Change the colour of the bars so that they’re pink.

Now under the series options, select Gap Width and change it to something around 36% so the bars appear thick.

Select the male bars by clicking on them.

Change the fill colour to blue. Your pyramid chart now looks like this:

16. Modify the data labels to get rid of the “negatives”.
Select the negative data labels.

Format the data labels by un-checking “Linked to source”, typing 0%;0%; in the format code, and clicking “Add”.

Your pyramid chart now looks like this:

17. Switch the Legend around so it matches your bar chart data.
The legend is confusing because it shows the pink Female on the left but the female bars are on the right, and the male legend is on the right, but the male data is on the left!
To change this, right click on the chart and click on “Select Data”.

Now, click on the little “down” arrow under the legend series, and select “OK”.

This switches around the legend so it matches your chart.

18. Select all your data labels and change them to “Bold” and “White”.
First, select your female data labels.

Choose “Bold”.

Then choose “White” for the font colour.

Now do the same thing for the male data labels – make the font Bold and White!

19. Your pyramid chart is now finished!
*Note: Which age categories should you use?
Every donor has their own preferred age category, and even different sectors need to have different age categories. Here are just a few different age category breakdowns so you can see the range of donor classifications.
In the OFDA Guidelines for Proposals, they ask for age category breakdown as follows:
- 0-11 months
- 1-4 years
- 5-14 years
- 15-49 years
- 50-60 years
- 60+ years
In the ECHO e-single form guidelines, they ask for age and sex disaggregated data in the following categories:
- Infants and young children (0-59 months, under 5 years)
- Children (5-17 years)
- Adults (18-49 years)
- Elderly (50+ years)
In the UN System, a broad-sweep age category breakdown, seen in the 2017 Syria HRP, is:
- Children (0-17 years)
- Adults (18-59 years)
- Elderly (60+ years)
If you’ve collected data on EVERY member of the household, so you know exactly how old each household member is, then it will be easy to choose any age categories you want.
If you’ve just collected data on how many males and females fall into each pre-defined category, then you’ve got to know which age categories you want to use before you collect your data!


