Home » xlsform

Tag: xlsform

2 1024x576 Featured Image

Audit Tool: Calculate the Time that a Data Collector takes per Question using ODK

One question that many M&E officers or information managers ask when collecting data in KoboToolbox or ODK, is “How long did the enumerator spend on each question?”  To track this, you can use a tool called an “audit log” in your XLSForm questionnaire.

It might be easiest if you want to watch a video tutorial on how to use this tool.  Here’s the video showing you all about the simple audit tool:

You can download the XLSForm template I used in the video (with “audit” in the metadata) from here.free template xlsform with audit metadata

Why would you want to know how long questions take in ODK?

  • you might want to see if enumerators are filling in information too fast
    • For example, they might be filling in data from memory after having a conversation with their interviewee.  This might not be a problem for some settings, but for a more robust survey, you might need them to fill in the answers as they go through the survey.
  • you might want to see if enumerators are getting stuck on a particular question
    • For example, is your questionnaire design causing delays?
  • what do you use it for?  I’d love to know!
    • one person told me he needed to track how long people spent on each question because he was running an IQ test using ODK, so needed to track how long people spent per question!

Add an Audit Question to your XLSForm

  1. The first step to take when you want to track the time it takes for a data collector to collect an answer is to open up your XLSForm.
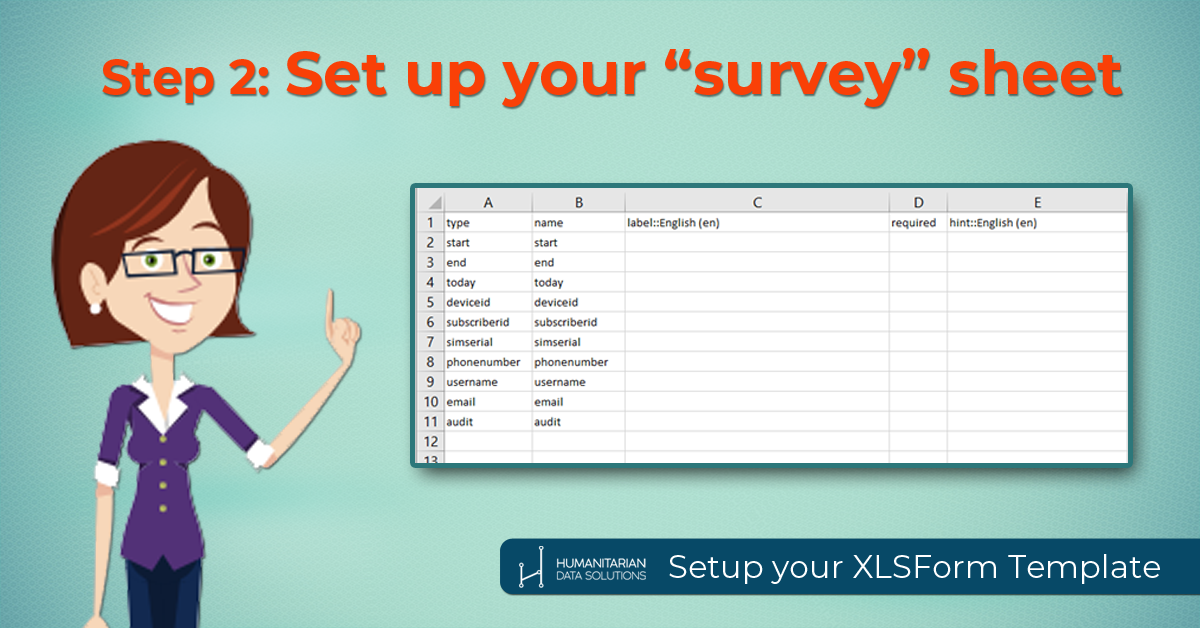
  2. I always put a “metadata” section at the very top of all my questionnaires.  This includes a start time, end time, today’s date, email, username of the data collector, etc.
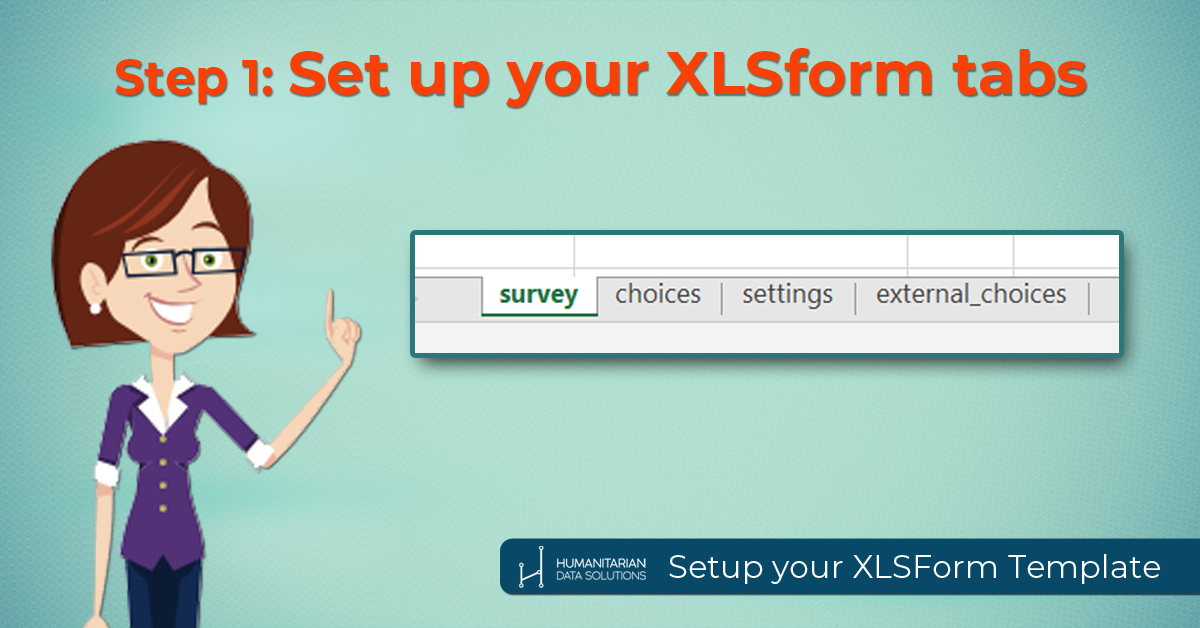
  3. In your metadata section, under the “type” column, add “audit”.
  4. And then under the “name” column, add “audit”.
  5. If you want the example form I used for the video tutorial, get it here.

template for audit

Put your Form on ODK Collect

  1. Upload your XLSForm to your server (such as KoboToolbox).
  2. On your ODK Collect app (or Kobo Collect app), tap on “Get Blank Form”.  Find the new questionnaire you’ve added to your server and download it to your app.
  3. Now tap on “Fill Blank Form” and you’ll be ready to collect the data.

Fill in your form on ODK Collect

  1. Go ahead and collect your data!

Download your data from Kobo Toolbox (or other server)

  1. Download the normal “XLS” style of data download (the same as you normally would).
  2. Then download the “Zip attachments” for your form.

Open your audit log

  1. In your main data file, you’ll see there’s a uuid column.  Every row of data will have a UUID (a random, unique identifier) for each submission.
  2. In your Zip file that you downloaded – you’ll find folders named with that UUID.
  3. Find the equivalent UUID folder, and find the “audit” file that’s in there.  Open it up.

Add a column named “time-elapsed”in the Audit file

  1. Add a column named “time-elapsed” in your audit log.
  2. Then create a formula like this:
    • =(d2-c2)/1000
  3. This will give you the elapsed time in seconds that was spent on each question!


Good luck – let me know in the comments below how you’re using the audit log, and if you have any questions!


YouTube Thumbnail Disability Featured Image

Collect Disability Data using the Washington Group Short Set

Do you disaggregate your data by disability status, whether you’re collecting monitoring data or programme activity data? In this article and tutorial video, I show you how to use the Washington Group Short Set of Questions on Disability and how to programme them into XLSForm so you can collect disability data using KoboToolbox or ODK.

Watch this video below as I show you how to programme these questions into your questionnaire so you can easily collect disability data:

And if you want the templates I use in the video, go get them here.

Follow these steps to create your own set of disability questions in KoboToolbox:

Short Set of Questions to Collect Disability Data

  1. Open up this website and find the Washington Group Short Set of Disability Questions.
  2. It’s a very short 6 questions that gives you the wording to collect disability data around six different health problems:
    1. difficulty seeing,
    2. hearing,
    3. walking or climbing steps,
    4. remembering or concentrating,
    5. difficulty with self care, or
    6. difficulty communicating in your usual language  (or being understood).

1. Create your XLSFORM (using a Field list)

Free template image for disability template

Open up your XLSForm where you’re creating your questionnaire.

In the “survey” tab:

  1. The “label” column is where you want to put the six questions. Copy and paste the six questions into the label column.
  2. Then in the “type” column, make them each a select_one question, and call the choice list “healthproblem” or something similar.
  3. Use the same type of question for all six questions.
  4. In the “name” column, give each of the questions a unique variable name, such as “seeing”, “hearing”, “walking”, “remembering”, “self-care”, and “communicating”.
  5. Now make a choice list under your “choices” tab.
  6. Copy the choice list name from your “select_one” question type, and go into the “choices” tab.

In the “choices” tab:

  1. Create a new list with “healthproblem” as the list_name.
  2. Then in the label column, enter
    1. “No, no difficulty”
    2. “Yes, some difficulty”
    3. “Yes, a lot of difficulty”
    4. “Cannot do it at all”
  3. In the name column, enter equivalent names, except with no spaces, no capital letters, no special characters:
    1. nodifficulty
    2. somedifficulty
    3. lotofdifficulty
    4. cannotdoatall.

Make your six disability questions into a “group”

This set of steps might get confusing – go grab the templates here if you need.

  1. Then, back in the “survey” tab, make the six questions into a group of questions so that they all show up on the same page in ODK Collect or Kobo Collect.
  2. Enter “begin group” in the type column before your set of questions.
  3. Enter “disability” in the “name” column for your group.
  4. And “end group” and “disability” after your set of six questions.
  5. TIP for groups:  I like to colour the Excel rows where I have “begin group” and “end group” so that I can see at a glance where my groups are in my XLSForm.
  6. Now go to the “appearance” column of your group.
  7. Enter “field-list” as the appearance.  That means that all the questions in this group will show up on the same page in ODK Collect or Kobo Collect when you go to collect disability data from respondents.

A couple last finishing touches:

  1. Now, add one more row at the top of your group of questions.  Enter “note” in the “type” column.
  2. Give your note a name in the “name” column, such as “healthproblem-note”
  3. Then copy the introduction statement from the Washington Short Set of Questions and paste that into the “label” column of the note.
  4. Then add a hint.  Enter “Read this statement out first.” in the hint column.
  5. Lastly, make sure that each of the six questions are “required” – so enter “yes” or “TRUE” into each question, under the “required” column.

2. Create your XLSFORM (using a table list)

There is one other way you could display this set of questions using a “table-list”.  It shows the questions a little bit differently on the screen of the mobile device or computer screen when you’re collecting the disability data.  It works better on a larger screen.  If you just have a small mobile phone that you’re using to collect the data, you can try it out and see if it looks good.

  1. So, add another “group” (using begin group and end group – see steps 14-16 above) around the six questions.
  2. Where you’ve entered “begin group”, enter “dis_table” into the “name” column.
  3. Where you’ve entered “end group”, enter “dis_table” into the “name” column.
  4. Then, in the appearance column of this new group, enter “table-list”.
  5. In KoboToolbox or ODK Collect, your set of questions will appear down the left-hand side.  Your possible answers will come across the top.  It looks like a table on your screen, and you have radio buttons that you can quickly select answers for each question.

Hope that was a helpful tutorial about how to collect disability data for your programme.  Please download the template and use it in your programme if you want! Download a free template for collecting disability data

how to collect GPS data

How to Collect GPS Data using ODK Collect and KoboToolbox

How do you collect GPS data using KoboToolbox or ODK?  In humanitarian and development work, it’s common to collect GPS locations to map your information.  Maybe you need to map village locations. Or maybe you’re mapping remote “roads” that don’t show up on any road map you have.  You might even need to map farmers’ fields if you’re running an agriculture project. These various types of geographical data can be summarized as:

  • Points:  you collect a single point, like a village location, or a household location, or a latrine location.
  • Lines: you collect a series of points in a row that all get joined together into one line.  This could be something like a road, a path, a river, etc.
  • Shapes (Polygons): if you have to collect data on an area, such as the shape of a building, or the area of a farmer’s field, or the outline of a refugee camp, for example, you would look at collecting a shape.

All these types of GPS data can be collected using KoboToolbox and ODK Collect.  Watch this video as I walk you through how to set up your questionnaire in XLSForm, then show you how to collect GPS data on the ODK Collect app:

Download the XLSForm Template that I show you in the video by clicking here.

FREE TEMPLATE - XLSForm to Collect GPS points, lines, and shapes

Here’s a step-by-step method for collecting GPS data using ODK Collect and KoboToolbox:

  1. Create your questionnaire using XLSForm.

If you want to know how to setup a blank template for creating questionnaires in XLSForm, you can check out this other blog article on creating a blank XLSForm template.

If you want to download the XLSForm questionnaire I used in the video, click here.

  1. Create a question for “geopoint”

When you collect a GPS point, then the “type” of question you create in your XLSForm is a “geopoint”.  Then give that question a “name” and a “label” and a “hint” (if you want).

You can leave the “appearance” column blank, or you can use a “maps” appearance or a “placement-map” appearance.

A “maps” appearance just shows a map in the background as ODK Collect collects your GPS point.

A “placement-map” appearance allows you to tap anywhere on a map to collect a GPS point anywhere you want (not necessarily just where you’re standing).

If you want to read more about collecting a geopoint, then check out the ODK documentation here.

  1. Create a question for “geotrace”.

When you collect a GPS line, then the “type” of question you create in your XLSForm is a “geotrace”.  Give that question a “name” and a “label” and a “hint” (if you want).

Leave the “appearance” column blank.

If you want to read more about collecting a geotrace, then check out the ODK documentation here.

  1. Create a question for “geoshape”

When you collect a GPS shape, then the “type” of question you create in your XLSForm is a “geoshape”.  Give that question a “name” and a “label” and a “hint” (if you want).

Leave the “appearance” column blank.

If you want to read more about collecting a geoshape, then check out the ODK documentation here.

  1. Upload your XLSform questionnaire to your KoboToolbox server (or whatever server you’re using).

Don’t forget to “Deploy” the form so that you can download it onto your Android device.  If you haven’t used KoboToolbox and ODK Collect before, then you can take this free course on getting started with KoboToolbox and ODK.

  1. Get the blank form on your mobile phone using the ODK Collect app.

Make sure you’ve connected your ODK Collect app to your KoboToolbox server.  Then hit “Get Blank Form” and download your questionnaire onto your phone.

Once again, if you haven’t used KoboToolbox and ODK Collect before, then you can take this free course on getting started with KoboToolbox and ODK.

  1. Collect your point.

Tap on “Start GeoPoint” to start collecting your GPS point.  Your phone will take a few moments to connect to some satellites so it can establish the GPS location.  The app will tell you how accurate it’s GPS reading is.  Wait until the accuracy is good, for example 10-20 meters, before you tap on “Save GeoPoint”.

  1. Collect your line.

You can collect a line like I do in the video, by just walking along the line, and having the phone automatically collect points every few seconds.  However, you can also manually collect points along the line.  Do what works best for your situation!

To read more about collecting geotrace data, then read further documentation here.

  1. Collect your shape.

You can collect a shape like I do in the video, by just walking around the shape, and having the phone automatically collect points every few seconds.  However, you can also manually collect points along the outline of the shape.  Do what works best for your situation!

To read more about collecting geoshape data, then read further documentation here.

If you’re interested in how to visualize all that data using QGIS, I’ve got a video and tutorial coming out next week to show you how.  So make sure you’re subscribed to my mailing list to get the weekly tutorials!


DIY Guide Blog Banner (9)

Prevent Selecting “None of the Above” with any Other Option – XLSForm Constraint Tutorial and Template

I want to share with you a useful XLSForm constraint that you can use when you create digital questionnaires for Kobo Toolbox, ODK, Ona, or SurveyCTO.  Someone recently asked me this question:

“How can I create a constraint such that respondents can’t select “I don’t know” and another option.  I want to create a constraint that prevents selecting “I don’t know” and any other option from a multiple_select question.”

This is such a good question.  And it is very common in humanitarian and development questionnaires, where we give a list of options and say “select ALL that apply”.  And then at the bottom of the list, we might have options like:

  • Not applicable
  • I don’t know
  • None of the above

But it wouldn’t make sense if the questionnaire allowed you to select “None of the above” with another option also.

So…there is a great constraint that you can use in your XLSForm to prevent this from happening.

Please watch this video to see the full explanation of how to create the constraint and how to construct the formula!

If you want to download the XLSForm Constraint Template, click here to go get your download.

Free Template Download

What this XLSForm Constraint is Trying to Prevent

  • We don’t want to allow anyone to select “none of the above” when they’ve selected any other answer.

Or we could also say…

  • We don’t want to allow anyone to select “none of the above” when they’ve selected more than one answer.

When we emphasise “more than one” answer, it indicates that part of the logic of our constraint will be looking at counting how many answers the respondent selected.  So let’s dig in…

Set Up the Question in XLSForm

Slide2

The important elements of the question set-up are as follows:

  1. It applies to a “select_multiple” question
  2. The choice list is under the “choices” tab.
  3. Options include choices such as “I don’t know”, “none of the above”, or “not applicable”
  4. The respondent sees the “label” for each option when he or she fills out the questionnaire
  5. The “name” for each label – is the variable name used in the constraint to refer to that option

Two Parts to the XLSForm Constraint FormulaSlide3

The first part of the formula that you need to know is:

selected(.,'none')

You can read more about this function on the OpenDataKit website.  It means that the respondent selected the choice “none” in the question that they’re currently answering. The “.” refers to the answer currently being input into the questionnaire.

Slide4

The second part of the formula that you need to know is:

count-selected(.)>1

You can read more about this function on the OpenDataKit website.  However, the main interpretation is that the form will count how many choices were selected in the current question, and it will check if that count is greater than 1.

So there is a Problem when…

The problem occurs when the respondent has

selected(.,'none') and count-selected(.)>1

The “and” means both these things have to be true for the problem to exist.  So, if the respondent hasn’t selected none, then it’s okay if count-selected(.) is greater than one.

 Writing the Final XLSForm Constraint

You can use “not()” in the XLSForm constraint formula to show that this situation is “not allowed” to occur when the form is being filled out.  The full constraint formula is:

not(selected(.,'none') and count-selected(.)>1)

The interpretation of that formula in plain-English would be: you are “not allowed” to “select none” if you’ve “selected more than one choice”Slide10

Enter this formula into the “constraint” column of the XLSForm.  If you want to know how to create your own Blank XLSForm Template, you can learn how to here.

How to create xlsform template

How to Setup a Blank XLSForm Template

When you first start to design a digital questionnaire in XLSForm – which works for ODK, ONA, SurveyCTO, and many other mobile data collection apps – then you probably want to have a blank XLSForm template setup and ready to go.

Setting up a blank XLSForm template means that when you need to create a new survey for your team, you can get started right away.  It’s so easy, saves time, and makes your work flow so much faster!  You’ll look very professional in front of your colleagues (and your boss!).

Before we start – you can download our free template so you don’t have to create one from scratch!!Download Now XLSForm Navy

1.  Set up your XLSform tabs

Step 1 set up your xlsform tabs

  • Open a new Excel spreadsheet
  • Save it as “Blank XLSForm Template”
  • Create 4 tabs in your workbook and name them as follows
    • survey
    • choices
    • settings
    • external_choices

2. Set up your “survey” sheet.

Step 2 set up your survey sheet on xlsform template

  • In your survey tab, add all the possible column names across the first row of your sheet. Name the columns as follows:
    • type
    • name
    • label
    • required
    • hint
    • constraint
    • constraint_message
    • relevant
    • required_message
    • calculation
    • repeat_count
    • appearance
    • choice_filter
    • default
    • read_only
    • media::image
    • media::audio
    • media::video
    • body::accuracyThreshold

Download Now XLSForm Green

  • ODK keeps adding new column names to their software so that it has enhanced capabilities. Just in case they’ve added new columns recently, go check out the most up-to-date list of XLSForm column names in their documentation.
  • Set up your XLSForm template for multiple languages. In your survey tab, these are columns that can be translated into multiple languages:
    • label
    • hint
    • constraint_message
    • required_message
    • media::image
    • media::audio
    • media::video
  • If you frequently create surveys in more than one language, then amend those column names to show your primary language, and create additional column names with your language variations.
Column names (multiple languages: showing English, Arabic, and French)
Change column names with your primary language: Add new column names with your second language: Add new column names with your third language:
label::English label::عربى label::français
hint::English hint::عربى hint::français
constraint_message::English constraint_message::عربى constraint_message::français
required_message::English required_message::عربى required_message:: français
media::image::English media::image::عربى media::image:: français
media::audio::English media::audio::عربى media::audio:: français
media::video::English media::video::عربى media::video:: français
  • Now set up your “metadata” questions in your survey tab. These questions should be included on every new survey you create. That way you won’t forget to capture all the data possible about when each form was filled out and which device filled it out.
    • Under the “type” column and the “name” column, put in the following questions:
type name
start start
end end
today today
deviceid deviceid
subscriberid subscriberid
simserial simserial
phonenumber phonenumber
username username
email Email
audit audit
  • A new feature that ODK has recently added to their software is the ability to add an “audit” feature to surveys, which captures details about how a data collector moves through a form and how long each question takes, for example. In order for this piece of metadata to work, you need to be using ODK Aggregate 1.5.0+ as your server.

3. Set up your “choices” sheet.

Step 3 Set up choices tab in XLSform Template

  • In your choices tab, add all the possible column names across the first row of your sheet. Name the columns as follows:
    • list name
    • name
    • label
  • If you are using multiple languages in your XLSForm template, your “label” column can also be multi-lingual. Similarly to the “survey” tab, you can amend your “label” column name to be “label::English” (or whatever your primary language is), and then add additional columns with your additional languages.  You must spell these language names EXACTLY THE SAME as the languages you added in your “survey” tab.
Change column names with your primary language: Add new column names with your second language: Add new column names with your third language:
label::English label::عربى label::français

4. Set up your “settings” sheet.

Step 4 Set up settings tab in XLSform Template

  • In your settings tab, add all the possible column names across the first row of your sheet. Name the columns as follows:
    • form_title
    • form_id
    • public_key
    • submission_url
    • default_language
    • version
    • instance_name
    • style
  • Set up encryption for your XLSForm template next. Although many people may not use encrypted forms, my recommendation if you are collecting beneficiary data for humanitarian or development projects is that you MUST protect their personal and sensitive data, so I would recommend you always use encryption on your forms.
    • Once you’ve created your private and public encryption keys for your team/project, and have stored your private key somewhere safe (don’t share this with anyone!), then copy and paste the public key into your settings tab under the “public_key” column.
  • Enter in the URL of your server into the “submission_url” column.
  • If you’re using multiple languages in most of your surveys, then add in your default language under the column “default_language”. If your data collectors collect the data all in a local language, then put the local language name here, so they don’t have to switch languages every time they fill out a new survey form.
  • You can have a naming convention for each new survey form that your data collectors submit. Enter the naming format into the column “instance_name”
    • For example, concat(${today}, ‘-‘, ${deviceid}, ‘-‘, uuid())
  • In the XLSForm template, leave “form_title” and “form_id” blank, because if they are blank, they will automatically show the name of your saved survey form. However, you can fill in an example form title and form id in your XLSForm template to remind you what to fill in when you’re creating a new survey.
    • For example, under form_title column, type in “Title in Collect App – Bilingual – عنوان ثنائي اللغة”
    • For example, under form_id column, type in “title_in_xml_english_version”

Download Now XLSForm Turquoise

5. Set up your “external_choices” sheet.

Step 5 Set up external_choices tab in XLSform Template

  • This tab is set up exactly like your “choices” tab.
  • You only need to use “external_choices” in some surveys when you have very big lists of selection choices. My recommendation is to set it up for your blank XLSForm template, but then when you’re creating a new survey, to delete this tab if it’s not needed.
  • In your external_choices tab, add all the possible column names across the first row of your sheet. Name the columns as follows:
    • list name
    • name
    • label
  • If you are using multiple languages in your blank XLSForm template, your “label” column can also be multi-lingual. Similarly to the “survey” tab, you can amend your “label” column name to be “label::English” (or whatever your primary language is), and then add additional columns with your additional languages.  You must spell these language names EXACTLY THE SAME as the languages you added in your “survey” tab.
Change column names with your primary language: Add new column names with your second language: Add new column names with your third language:
label::English label::عربى label::français


6. Finalize your Blank XLSForm Template and save it!

Step 6 Finalize and save the XLSform Template

  • You’ve now completed setting up your blank XLSForm template!
  • Press “save” and get going on creating new surveys faster!

Download Now XLSForm Navy